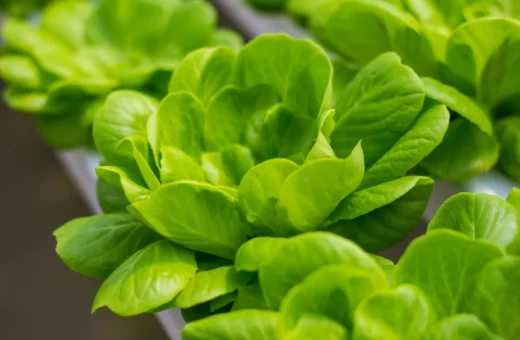
A self-watering planter box for the windowsill or kitchen counter is a smaller, more accessible alternative to a full vertical wall system. This guide covers two specific designs: a 24-inch window box and a 18-inch counter box, both built from cheap materials in under 90 minutes. Each holds 6-8 plants and waters itself for 7-14 days.

The Quick Answer
- Cost: $15-$30 per box.
- Build time: 60-90 minutes.
- Holds: 6-8 plants (herbs or salad greens).
- Reservoir lifespan: 7-14 days unattended.
- Skill level: beginner — minimal tools needed.
Design 1: 24-Inch Window Box
Materials
- 24-inch food-grade plastic window box ($8-$15).
- Empty 1-liter plastic bottle (free).
- Cotton wicking rope or thick string (12 inches).
- Lightweight potting mix.
- Power drill and 5/16-inch bit.
- Window box brackets if mounting outside.
Steps
- Cut the bottom 2 inches off the plastic bottle. This becomes the wicking reservoir insert.
- Drill 8-10 small holes in the cut piece’s sides.
- Stand the cut piece in one end of the window box; thread cotton rope through the holes (the rope acts as the wick).
- Fill the box with lightweight potting mix up to 1 inch from the top.
- Insert seedlings (herbs, lettuce) along the box length.
- Fill the reservoir piece with water via a watering can. The wicking rope slowly draws water into the soil.
According to USDA urban agriculture guidance, sub-irrigation (the wicking method used here) keeps soil at consistent moisture without over-watering — ideal for beginners.
Design 2: 18-Inch Kitchen Counter Box
Materials
- 18-inch food-grade plastic herb planter with built-in tray ($10-$18).
- Empty plastic bottle for the reservoir.
- Cotton wick (10 inches).
- Lightweight potting mix.
Steps
- Use the same wicking insert method as Design 1.
- The included tray catches drips; doesn’t need wall mounting.
- Position the box where it gets 6+ hours of bright light (kitchen window).
- Plant 6-8 herbs or lettuce starts.
- Add water weekly.
Which Design Is Right for You
- Renting and outdoor light? Window box outside the kitchen window.
- Bright kitchen counter? Counter box version.
- No direct light? Add a small grow light (15-25W).
Sources and References
- USDA Urban Agriculture
- EPA Recycling Guidelines
- Cornell Cooperative Extension
- North Carolina State Extension
Frequently Asked Questions
Can I use a plastic bottle in a food-growing system?
Use food-grade plastics (codes 2 PET, 4 LDPE, 5 PP). Avoid PVC (3) and polystyrene (6) for food.
How often do I refill the reservoir?
Every 7-14 days depending on plant size and room conditions.
Will plants get overwatered?
No — wicking only draws moisture as soil needs it. Naturally self-regulating.
Can I build a larger version?
Yes — same method scales to 48-inch boxes. Use a 2-liter reservoir bottle for larger setups.
This article was researched and fact-checked by Lena Hartwell and the Nexamundo editorial team. Last reviewed on May 19, 2026.
Safety note: always use food-grade plastic for edibles. Test wicking with water before planting.